If you’re looking to install laminate flooring, chances are you want a solution that’s affordable, durable, and simple enough to handle without hiring a full renovation crew. You’re not just searching for steps — you want clear guidance that helps you avoid costly mistakes, choose the right materials, and end up with a professional-looking finish.
This article is designed to walk you through the process in a practical, easy-to-follow way. From preparing your subfloor and selecting the right underlayment to laying planks efficiently and handling tricky corners, we focus on what actually matters during installation. No fluff. No confusing jargon.
Our guidance is built on proven DIY renovation practices, current home improvement standards, and real-world application techniques that homeowners rely on every day. By the end, you’ll understand not only how to install laminate flooring step by step, but also how to ensure it lasts for years to come.
Before You Begin: Essential Preparation and Tools
Before you install laminate flooring, slow down. Prep work is where pros separate themselves from weekend warriors (and where most DIY regrets begin).
Subfloor Inspection
Your subfloor must be clean, flat, and dry. “Flat” doesn’t mean “looks fine.” It means no more than 3/16-inch variation over 10 feet, per National Wood Flooring Association guidelines. Use a long straightedge or level for the classic level test: lay it across the floor and check for gaps or rocking. Minor dips can be filled with floor leveler; high spots can be sanded down. In humid regions like the Southeast, always test for moisture with a meter—concrete slabs are notorious for hidden dampness.
Acclimation Is Non-Negotiable
Laminate planks expand and contract with temperature and humidity. Let them sit unopened in the room for at least 48 hours. Stack boxes flat, cross-stacked for airflow, away from exterior walls. Skip this step and you risk buckling (and nobody wants a floor that waves like the ocean).
Gathering Your Arsenal
Essential tools:
- Tape measure
- Tapping block
- Pull bar
- Miter saw or laminate cutter
- Jigsaw
- Safety glasses
Recommended: knee pads, pencil, speed square.
Preparation is the real installation. (Pros know.)
Step 1: Installing the Underlayment and First Row
Rolling Out the Foundation
Underlayment is the thin foam or felt layer that sits between your subfloor and laminate planks (think of it as the shock absorber for your floor). When you roll it out, butt the seams together—never overlap them. Overlapping creates ridges; butting keeps the surface flat. Secure seams with manufacturer-recommended tape.
Option A vs. Option B:
- Butted seams: Smooth finish, stable planks.
- Overlapped seams: Uneven boards, premature wear.
It’s a small detail that separates a professional-looking install from a DIY “close enough.”
Planning Your Layout
Start along the longest, straightest wall. Measure the room’s width and divide by the plank width to preview your final row. If the last row will be less than 2 inches wide, trim the first row instead. This balances the layout (because no one wants a sliver of flooring hugging the wall like an afterthought).
The Critical First Row
Place planks with the tongue side facing the wall. Insert 1/4″ to 3/8″ spacers to maintain the expansion gap—this allows the floor to expand and contract with humidity.
- With spacers: Prevents buckling.
- Without spacers: Warped edges later.
Ensure the first row is perfectly straight; every row after follows its lead. When you install laminate flooring, precision here determines everything.
Step 2: Laying the Main Body of the Floor
Now comes the satisfying part—where your room finally starts to look finished.
The Click-Lock Method
Most modern laminate uses a click-lock system—a design where the tongue (the protruding edge) slides into the groove (the receiving channel). To connect planks, insert the tongue at a slight angle, then lower it until you hear that reassuring “click.” As one contractor once told me, “If you have to force it, you’re doing it wrong.” The plank should lock smoothly with light pressure.
If you’re learning to install laminate flooring for the first time, think of it like snapping together puzzle pieces—firm but never forced.
Staggering for Strength and Style
Staggering seams—offsetting row joints by at least 6–8 inches—adds structural stability and looks more natural. Flooring specialist Mark Jensen explains, “When seams line up, the floor weakens and screams ‘DIY.’” Use the offcut from your previous row to start the next one. (Bonus: less waste, more savings.)
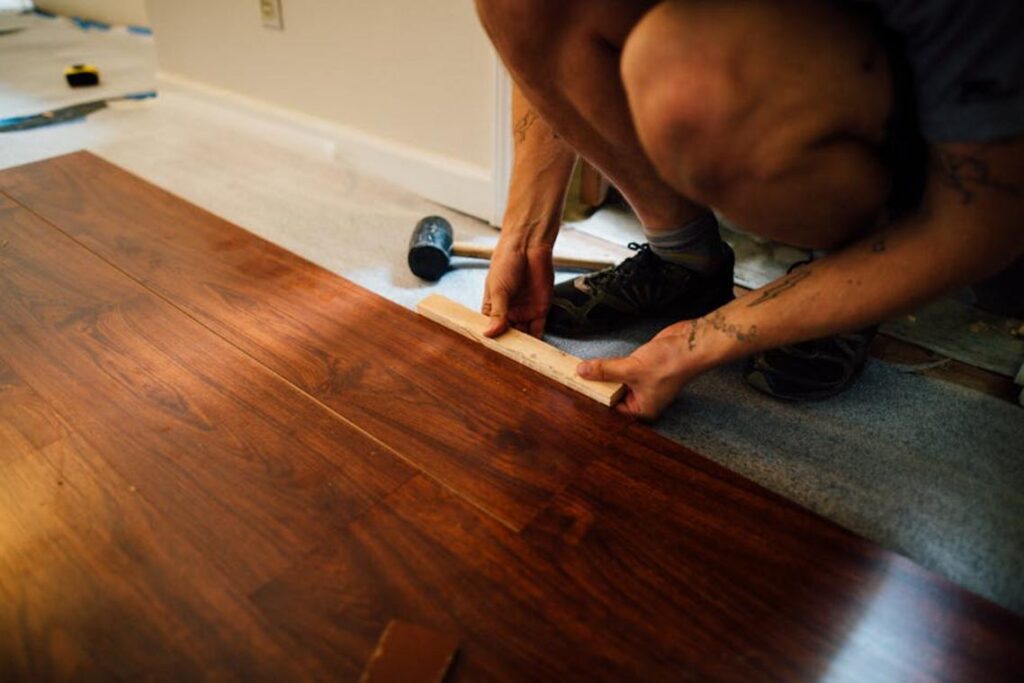
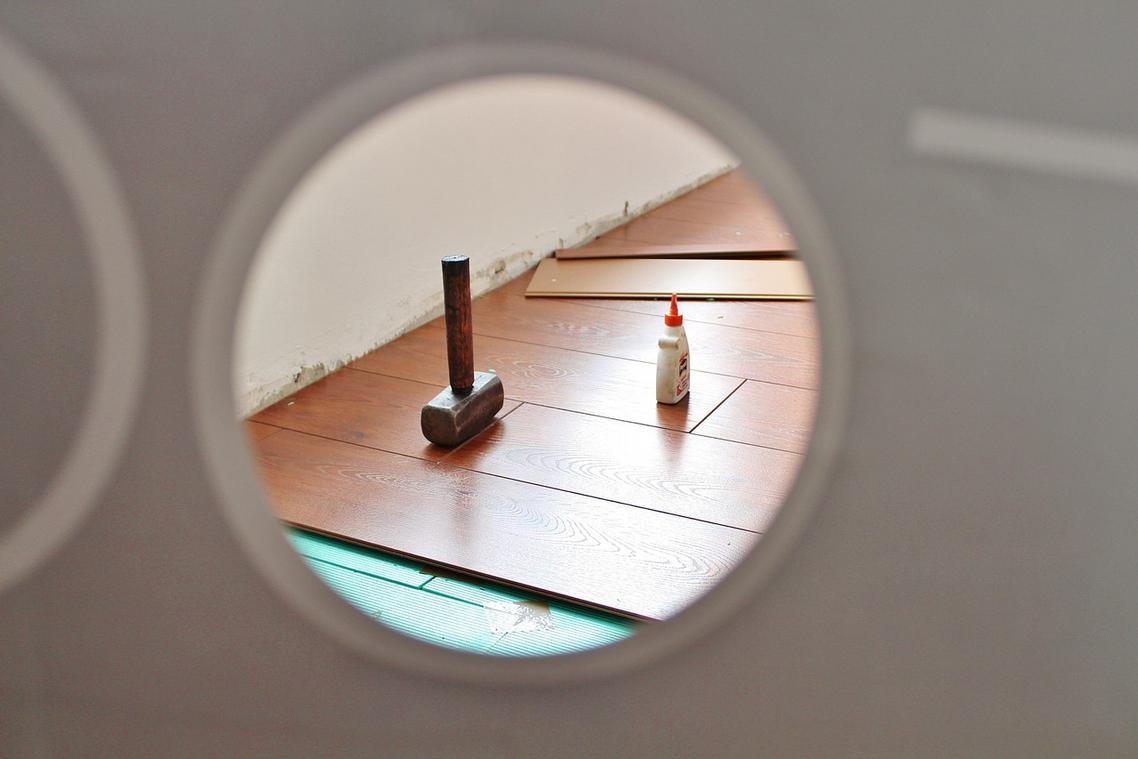
Using the Tapping Block
A tapping block protects the plank’s edge while you gently tap it into place with a mallet. Never strike the plank directly. Light taps close small gaps without damaging the locking mechanism.
And if you’re refreshing the entire room, pair your new floors with ideas from how to paint kitchen cabinets for a modern look for a cohesive upgrade.
Step 3: Navigating Obstacles and Making Precision Cuts
Precision is what separates a weekend project from a floor that looks professionally installed. In fact, according to the National Wood Flooring Association (NWFA), poor measuring and cutting are among the top reasons for flooring callbacks.
Cutting End Pieces
First, measure the remaining gap at the end of the row. Then use the “flip and mark” technique: rotate the plank 180 degrees, align the tongue to tongue, and mark where it meets the wall (accounting for expansion space). This reduces measuring errors—a common DIY pitfall.
Working Around Doorways
Next, undercut the door jamb using a handsaw or oscillating tool. Place a scrap plank on the floor as a height guide and cut horizontally so the new plank slides underneath. Clean undercuts create that seamless finish you see in model homes.
Fitting Around Vents and Pipes
Finally, use a jigsaw for irregular cuts. For complex shapes, trace a paper template first (pro tip: painter’s tape stabilizes small pieces). Careful detailing ensures your install laminate flooring project looks polished and lasts longer.
Step 4: The Final Row and Finishing Touches
The last row is often the trickiest. Because walls aren’t perfectly straight (thanks, real life), you’ll likely need to rip-cut the planks lengthwise. To lock them in place:
- Measure the gap, subtract the expansion space (a small buffer that allows flooring to expand).
- Cut planks to fit.
- Use a pull bar (a flat metal tool for tight spaces) and a mallet to snug boards against the wall.
Next, remove all spacers. Then install baseboards or quarter-round molding, securing trim to the wall—not the floor—so the floor can “float.”
Finally, add transition strips. Use T-molding between similar floors, reducers when meeting lower surfaces. When you install laminate flooring correctly, these details make it look professionally finished (HGTV-level satisfying).
Ready to Transform Your Floors?
You came here because you wanted to know exactly how to install laminate flooring without costly mistakes, wasted materials, or second-guessing every step. Now you have the roadmap — from prep and underlayment to locking planks in place and finishing with clean, polished edges.
The biggest frustration with flooring projects is simple: fear of doing it wrong and ending up with gaps, buckling, or uneven boards. But with the right preparation and a clear step-by-step approach, this is a project you can absolutely handle with confidence.
Here’s your next move: gather your tools, measure your space carefully, and set aside dedicated time to complete the job without rushing. Follow each step methodically, and don’t skip the prep work — that’s where most problems start.
If you want more smart, practical home guides that simplify DIY projects and help you avoid expensive contractor fees, explore our proven tips and step-by-step resources today. Thousands of readers rely on our practical home solutions to get it done right the first time — and you can too. Start your flooring upgrade now and enjoy the transformation under your feet.
 Founder & CEO
Thalira Norvessa is the kind of writer who genuinely cannot publish something without checking it twice. Maybe three times. They came to daily digest through years of hands-on work rather than theory, which means the things they writes about — Daily Digest, Wuta DIY Renovation Techniques, Lifestyle Organization Strategies, among other areas — are things they has actually tested, questioned, and revised opinions on more than once.
That shows in the work. Thalira's pieces tend to go a level deeper than most. Not in a way that becomes unreadable, but in a way that makes you realize you'd been missing something important. They has a habit of finding the detail that everybody else glosses over and making it the center of the story — which sounds simple, but takes a rare combination of curiosity and patience to pull off consistently. The writing never feels rushed. It feels like someone who sat with the subject long enough to actually understand it.
Outside of specific topics, what Thalira cares about most is whether the reader walks away with something useful. Not impressed. Not entertained. Useful. That's a harder bar to clear than it sounds, and they clears it more often than not — which is why readers tend to remember Thalira's articles long after they've forgotten the headline.
Founder & CEO
Thalira Norvessa is the kind of writer who genuinely cannot publish something without checking it twice. Maybe three times. They came to daily digest through years of hands-on work rather than theory, which means the things they writes about — Daily Digest, Wuta DIY Renovation Techniques, Lifestyle Organization Strategies, among other areas — are things they has actually tested, questioned, and revised opinions on more than once.
That shows in the work. Thalira's pieces tend to go a level deeper than most. Not in a way that becomes unreadable, but in a way that makes you realize you'd been missing something important. They has a habit of finding the detail that everybody else glosses over and making it the center of the story — which sounds simple, but takes a rare combination of curiosity and patience to pull off consistently. The writing never feels rushed. It feels like someone who sat with the subject long enough to actually understand it.
Outside of specific topics, what Thalira cares about most is whether the reader walks away with something useful. Not impressed. Not entertained. Useful. That's a harder bar to clear than it sounds, and they clears it more often than not — which is why readers tend to remember Thalira's articles long after they've forgotten the headline.