Planning a home upgrade or tackling a weekend project can be exciting—but it can also be overwhelming if you’re not sure where to start. If you’re searching for practical guidance on home solutions, organization ideas, or safe ways to handle renovations yourself, this article is designed with you in mind. We break down complex tasks into clear, manageable steps so you can improve your space confidently and efficiently.
You’ll find actionable advice, smart living hacks, and essential DIY renovation safety tips to help you avoid costly mistakes and prevent injuries. From tool handling and proper ventilation to material selection and workspace setup, we focus on the details that truly matter.
Our recommendations are grounded in established safety standards, manufacturer guidelines, and best practices used by experienced contractors and home improvement professionals. The goal is simple: give you trustworthy, easy-to-follow insights so you can create a safer, smarter, and more functional home.
Your Blueprint for a Hazard-Free Renovation
There’s nothing like the thrill of knocking down a wall (very HGTV of you). But before you grab the sledgehammer, let’s talk about the not-so-glamorous side: airborne dust (tiny particles that linger in the air), electrical hazards, and structural instability. Renovations—whether a quick paint job or full demo—come with real risks.
This guide is your practical checklist for staying safe, grounded, and injury-free. Think of it as your crash course in DIY renovation safety tips—without the crash.
Expect:
- Clear hazard prevention steps
- Simple safeguards that protect family and property
You’ll walk away confident, prepared, and fully intact (which is the goal).
Phase 1: Planning and Preparation for a Safe Workspace
Before swinging a hammer, slow down. Planning is your first safety tool. Most renovation injuries happen not during dramatic demo scenes, but during poorly planned prep (yes, even before the fun starts).
Assess Your Skill Level
Be honest about what you can handle. Cosmetic upgrades like painting or installing shelves are beginner-friendly. But licensed professional work—such as rewiring electrical circuits, rerouting plumbing lines, or altering load-bearing (structural) walls—requires certified expertise. Structural walls are walls that support the weight of your home above them. Removing one without reinforcement can cause serious damage. Some argue that online tutorials make anything DIY-friendly. The reality? Building codes and safety regulations exist for a reason.
Test for Hidden Dangers
If your home was built before 1990, test for asbestos, lead paint, and mold before demolition. Asbestos is a once-common fireproofing material now linked to lung disease (CDC). Lead paint exposure can cause neurological harm, especially in children (EPA). These aren’t scare tactics—they’re facts.
Isolate the Work Zone
Seal doorways and vents with plastic sheeting and painter’s tape. This creates a containment barrier to prevent dust migration. Think of it as quarantining the mess.
Prioritize Ventilation
Ventilation means actively replacing stale, contaminated air with fresh air. Use box fans facing outward to create negative pressure, open windows strategically, and consider HEPA (High-Efficiency Particulate Air) scrubbers for larger projects.
Map Out Utilities
Locate your main water shutoff valve and label breaker panel circuits clearly. Pro tip: flip breakers one at a time and label them properly—future you will be grateful.
Follow these DIY renovation safety tips to create a workspace that protects both your project and your health.
Your Personal Safety Toolkit: Must-Have Protective Gear
Eye Protection: Standard eyeglasses aren’t built to stop high-speed debris or chemical splashes. That’s where ANSI-rated safety glasses come in. ANSI (American National Standards Institute) certification means the lenses meet impact testing standards. In other words, they’re designed to take a hit so your eyes don’t.
Respiratory Protection: Masks aren’t one-size-fits-all. An N95 mask filters at least 95 percent of airborne particles, making it ideal for fine dust like sanding drywall. However, fumes from paints, solvents, or adhesives require a respirator with cartridges. A respirator seals tightly and uses replaceable filters to trap vapors.
Hand Protection: Gloves should match the job. Heavy-duty leather works for demolition; cut-resistant fabrics protect against sharp edges; nitrile resists chemicals during staining or painting. (Yes, dishwashing gloves won’t cut it.)
Hearing Protection: Power tools like saws, sanders, and nail guns often exceed 85 decibels. Prolonged exposure can cause permanent hearing loss, so use foam earplugs or over-ear muffs.
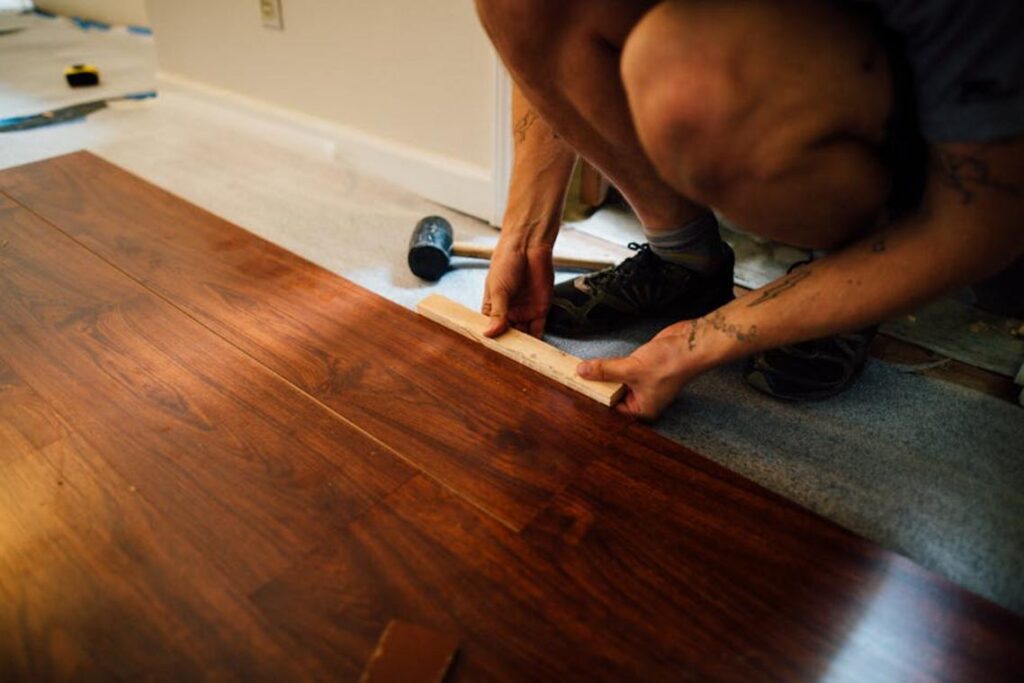
Proper Footwear: Finally, wear sturdy, closed-toe boots, ideally steel-toe, to guard against falling objects and hidden nails. For more DIY renovation safety tips, review our beginners guide to installing laminate flooring step by step before starting any new project.
Active Project Safety: Navigating Daily On-the-Job Risks
Every job site has risks—but most accidents happen when basic rules are misunderstood or skipped. Let’s break down the essentials in plain language.
Electrical Safety First means completely cutting power before touching wires. “De-energize” simply means shutting off electricity at the breaker box, not just flipping a wall switch. Always double-check with a non-contact voltage tester (a handheld tool that detects live current without touching exposed wires). Some argue quick fixes don’t require killing power. That’s a gamble. According to the Electrical Safety Foundation International, thousands of home electrical injuries occur annually due to preventable contact with live circuits.
Safe Tool Operation starts with reading the manual—yes, even if you think you know how it works. Manufacturers include safety details specific to that model. Inspect cords for frays, keep guards in place, and never override built-in protections. (Those guards aren’t “optional upgrades.”) Pro tip: Store manuals digitally so they’re easy to reference mid-project.
Ladder and Scaffolding Stability follows the 4-to-1 rule: for every 4 feet of ladder height, position the base 1 foot from the wall. Maintain three points of contact—two hands and one foot, or two feet and one hand—at all times. It’s simple physics, not superstition.
Ergonomics and Lifting prevents strain. Lift with your legs, keep loads close to your body, and avoid twisting. Back injuries are among the most reported workplace issues (BLS data).
A clean site matters. Use these DIY renovation safety tips:
- Sweep debris frequently
- Coil and secure extension cords
- Return tools after use
Because a tidy workspace isn’t about neatness—it’s about preventing falls before they happen.
Meticulous Cleanup and Final Checks
First, tackle debris with intention. I recommend wearing thick gloves and sealing sharp scraps in a sturdy contractor bag before they leave the room. Next, use a shop vacuum with a fine dust filter (HEPA) to trap particles regular vacuums simply recirculate. These DIY renovation safety tips prevent lingering hazards.
After that, perform a full systems check. Test outlets, flip switches, run faucets, and inspect for slow drips. Finally, remove plastic sheeting slowly, folding inward to trap dust. Pro tip: mist it lightly with water to keep particles from billowing back into clean living spaces.
Building a Better, Safer Home
You now have a framework to manage your renovation with safety first.
Here’s the contrarian truth: a stunning finish means nothing if someone gets hurt. Popular advice obsesses over countertops and color palettes, but success is completing the job without injury or incident.
This approach works because a proactive, safety-first mindset prevents costly mistakes, protects your health, and keeps pride intact.
Use these anchors:
- Plan before power tools.
- Follow DIY renovation safety tips every time.
- Pause, reassess, proceed.
Bookmark this [guide] and treat it as your pre-project checklist. Renovate confidently. Today.
You came here looking for practical ways to improve your home, simplify your routines, and tackle projects with more confidence. Now you have actionable strategies to organize smarter, upgrade your space, and approach every project with clarity instead of confusion.
The biggest frustration with home improvement and lifestyle changes isn’t a lack of ideas — it’s not knowing where to start or how to avoid costly mistakes. By applying these smart living hacks and following DIY renovation safety tips, you protect your time, your budget, and your peace of mind.
Small, intentional upgrades done the right way create lasting results. When you combine planning, organization, and safety, you turn overwhelming projects into manageable wins.
Make Your Next Home Project a Success
Don’t let uncertainty or safety concerns delay your next upgrade. Get step-by-step guidance, proven organization systems, and expert-backed DIY renovation safety tips trusted by thousands of readers looking to improve their homes the smart way. Start your next project with confidence today — explore more practical guides and put your plan into action now.
 DIY & Smart Living Specialist
Alico Erbyons has opinions about smart living hacks. Informed ones, backed by real experience — but opinions nonetheless, and they doesn't try to disguise them as neutral observation. They thinks a lot of what gets written about Smart Living Hacks, Knowledge Corner, Lifestyle Organization Strategies is either too cautious to be useful or too confident to be credible, and they's work tends to sit deliberately in the space between those two failure modes.
Reading Alico's pieces, you get the sense of someone who has thought about this stuff seriously and arrived at actual conclusions — not just collected a range of perspectives and declined to pick one. That can be uncomfortable when they lands on something you disagree with. It's also why the writing is worth engaging with. Alico isn't interested in telling people what they want to hear. They is interested in telling them what they actually thinks, with enough reasoning behind it that you can push back if you want to. That kind of intellectual honesty is rarer than it should be.
What Alico is best at is the moment when a familiar topic reveals something unexpected — when the conventional wisdom turns out to be slightly off, or when a small shift in framing changes everything. They finds those moments consistently, which is why they's work tends to generate real discussion rather than just passive agreement.
DIY & Smart Living Specialist
Alico Erbyons has opinions about smart living hacks. Informed ones, backed by real experience — but opinions nonetheless, and they doesn't try to disguise them as neutral observation. They thinks a lot of what gets written about Smart Living Hacks, Knowledge Corner, Lifestyle Organization Strategies is either too cautious to be useful or too confident to be credible, and they's work tends to sit deliberately in the space between those two failure modes.
Reading Alico's pieces, you get the sense of someone who has thought about this stuff seriously and arrived at actual conclusions — not just collected a range of perspectives and declined to pick one. That can be uncomfortable when they lands on something you disagree with. It's also why the writing is worth engaging with. Alico isn't interested in telling people what they want to hear. They is interested in telling them what they actually thinks, with enough reasoning behind it that you can push back if you want to. That kind of intellectual honesty is rarer than it should be.
What Alico is best at is the moment when a familiar topic reveals something unexpected — when the conventional wisdom turns out to be slightly off, or when a small shift in framing changes everything. They finds those moments consistently, which is why they's work tends to generate real discussion rather than just passive agreement.