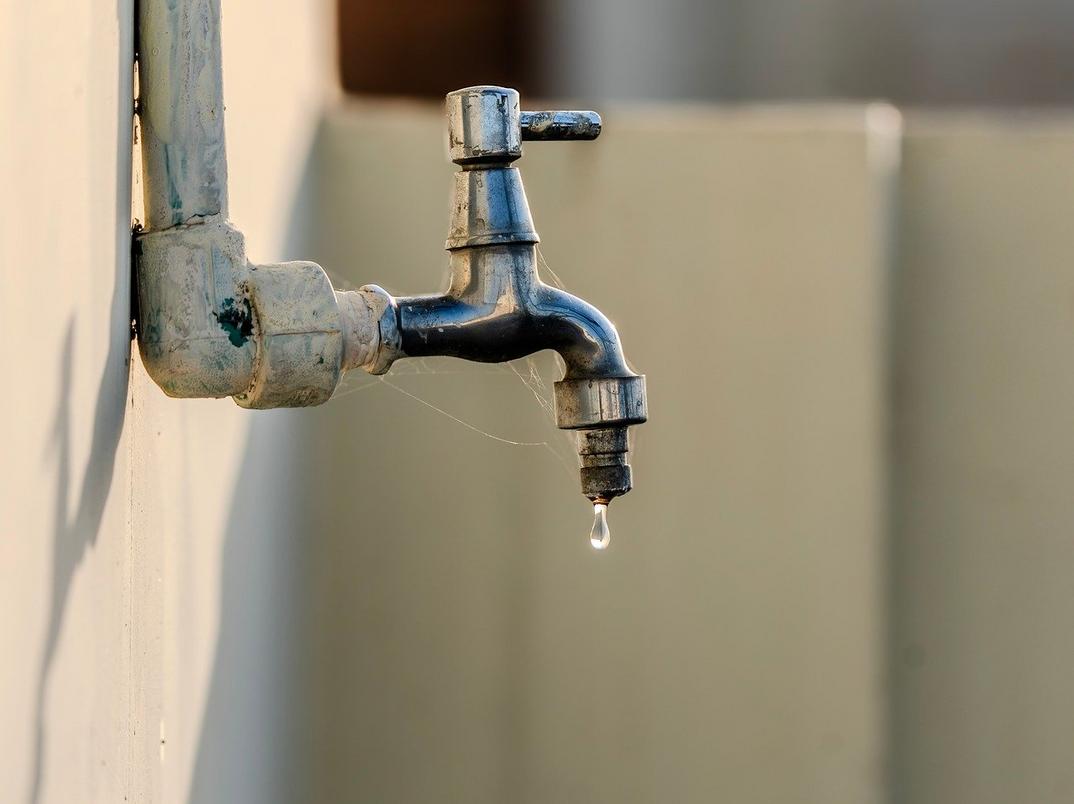
If you’re searching for how to fix leaky faucet, you likely want a solution that’s quick, affordable, and actually works. A constant drip isn’t just annoying—it can waste gallons of water, increase your utility bill, and signal deeper plumbing issues if left unchecked. This guide is designed to walk you through clear, practical steps to identify the cause of the leak and repair it with confidence, whether you’re dealing with a compression, cartridge, ball, or ceramic disc faucet.
We’ve carefully reviewed common household plumbing problems, consulted trusted home improvement resources, and analyzed proven repair methods to ensure the steps shared here are accurate and beginner-friendly. You’ll learn what tools you need, how to diagnose the problem correctly, and how to prevent future leaks.
By the end of this article, you’ll know exactly what to do to stop the drip and restore your faucet to proper working order—without unnecessary guesswork or expense.
End the Annoying Drip for Good: A 10-Minute Guide
That relentless drip, drip, drip isn’t just annoying—it can waste up to 3,000 gallons per year (EPA). Here’s how to fix leaky faucet problems fast.
- Turn off water under the sink.
- Plug the drain.
- Remove handle and cartridge or washer.
- Match the worn part at a hardware store.
- Reassemble and test.
Compression faucets use rubber washers; cartridge models use plastic or brass inserts. Not sure which you have? Twist the handle: multiple turns mean compression. Pro tip: bring the old part with you. Save money instantly.
What Kind of Faucet Do You Have? The Crucial First Step
Before you attempt to fix leaky faucet issues, you need to know what you’re working with. Not all faucets are built the same, and the internal parts—meaning the hidden components that control water flow—vary dramatically.
First, compression faucets have two handles you tighten to close. They rely on a rubber washer (a small sealing ring) that presses against a valve seat. When that washer wears out, drip… drip… drip (the soundtrack of 2 a.m.).
Next, cartridge faucets use a movable stem cartridge to regulate temperature and flow. If it’s leaking, the cartridge likely needs replacing.
Meanwhile, ceramic disk faucets use two ultra-hard ceramic plates. They’re durable but can crack under debris buildup.
Finally, ball faucets contain a rotating ball assembly with O-rings (circular seals) and springs that wear over time.
Pro tip: According to the EPA, household leaks waste nearly 10,000 gallons annually (EPA.gov). Identifying your type first saves time, money, and at least one unnecessary hardware store trip.
Assembling Your Toolkit: Everything You’ll Need
Before you fix leaky faucet issues, gather your tools so the job feels smooth instead of scrambled. Picture the cool weight of a Phillips screwdriver in your palm and the faint metallic click as it meets a screw. You’ll need Phillips and flat-head screwdrivers, an adjustable wrench, and slip-joint pliers.
Helpful extras make a difference:
- A rag to plug the drain (that hollow clink of a lost screw is THE WORST)
- A small bowl for tiny parts
- White vinegar to dissolve chalky mineral buildup
Bring old O-rings, washers, or cartridges to the store for an exact match.
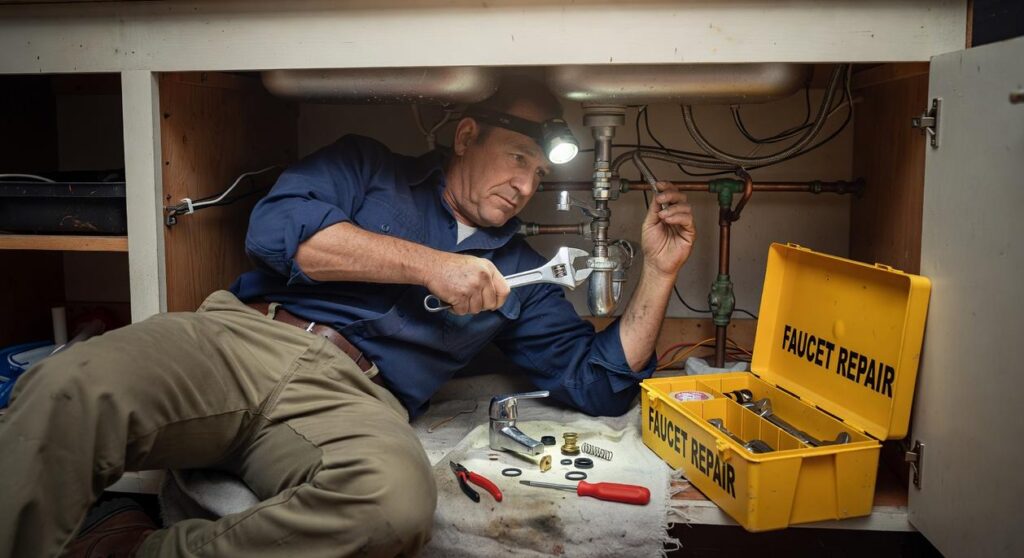
The Step-by-Step Repair: A Detailed Walkthrough
Let’s be honest—few household sounds are more irritating than a steady drip at 2 a.m. (It’s like your faucet is auditioning for a percussion band.) The good news? You can fix it yourself. Here’s exactly how to fix leaky faucet problems without losing your sanity.
Step 1: Shut Off the Water
First—and this is non-negotiable—turn off the water supply. Look under the sink for the shutoff valves and twist them clockwise until fully closed. Then turn the faucet on to drain any remaining water. Skipping this step is how small DIY jobs turn into indoor swimming pools.
Step 2: Disassemble the Faucet Handle
Next, pry off the decorative cap on the handle using a flathead screwdriver. Underneath, you’ll find a screw. Remove it and lift the handle off. If it’s stuck, wiggle gently instead of forcing it (because stripped screws are a whole new headache).
Step 3: Remove the Faulty Component
Now identify your faucet type. A cartridge faucet uses a movable stem cartridge to control water flow. A compression faucet relies on a rubber washer that presses against a valve seat.
Use a wrench to loosen the packing nut. For cartridge models, pull the cartridge straight out. For compression types, unscrew the stem to access the washer. Yes, this is usually where things look more complicated than expected—but stay with it.
Step 4: Inspect and Replace
Check washers, O-rings (small rubber rings that create watertight seals), and cartridges for cracks, tears, or corrosion. Replace damaged parts with matching pieces from your kit. A thin layer of plumber’s grease on O-rings helps create a stronger seal and prevents future wear.
Step 5: Clean the Components
Before reassembling, soak reusable parts in white vinegar to dissolve mineral buildup. Scrub gently with a small brush. Hard water deposits are often the silent culprit behind persistent drips.
Step 6: Reassemble and Test
Finally, reassemble everything in reverse order. Turn the water back on slowly. Check for leaks and test the handle several times. No drip? Victory.
If you enjoy practical home wins like this, you might also like this step by step guide to patching small holes in drywall—because tiny home problems have a way of multiplying when ignored.
Still Dripping? Common Problems and Quick Fixes
So, you tried to fix leaky faucet issues and that stubborn drip is still tapping away like a metronome in a silent room. Frustrating, right? First things first: if the leak persists, you may have over-tightened or under-tightened a connection. Think of it like closing a jar—too loose and it spills, too tight and you warp the lid. Disassemble the faucet again and check that every part is seated properly and screws are snug, not forced.
Meanwhile, if water is pooling at the base of the handle, the culprit is usually a worn-out O-ring. An O-ring is a small rubber seal that acts like a gasket bodyguard, preventing water from sneaking through gaps. Replace it, and you’ll likely stop the escape route.
On the other hand, if your new parts don’t fit, don’t panic. Faucet components aren’t universal. Always bring the old parts to the store—matching them is like finding the right puzzle piece.
Sometimes you have to admit defeat. If the faucet body is cracked or the valve seat is eaten by corrosion, your weekend plan to fix leaky faucet can spiral fast. I’ve learned that forcing stuck parts only invites disaster.
- Cracked housings
- Seized components
Saving worth flooding? Call plumber.
Enjoy the Silence and Your Savings
You did it. You chose to fix leaky faucet issues before they drained your patience and your wallet. That tiny washer (the small rubber ring that creates a watertight seal) may cost less than a coffee, but replacing it protects you from higher water bills and hidden cabinet damage.
Here’s what’s in it for you:
- Lower utility costs from stopping wasted water
- Longer faucet lifespan by reducing internal wear
- Peace and quiet in your kitchen (no more midnight drip soundtrack)
A simple repair today means fewer costly surprises tomorrow. That’s smart homeownership in action.
Ready to Take Control of That Drip for Good?
You came here because that constant drip is wasting water, driving up your bill, and testing your patience. Now you know exactly how to fix leaky faucet issues step by step—without unnecessary stress or guesswork.
A leaky faucet isn’t just annoying. It’s a daily reminder that small problems can turn into expensive repairs if ignored. The good news? You have the knowledge to stop the leak, protect your plumbing, and restore peace to your kitchen or bathroom.
Don’t let that drip linger another day. Grab your tools, follow the steps you’ve learned, and take care of it now. And if you want more practical, no-fluff home solutions that save you time, money, and frustration, explore our expert tips and smart living guides today. Thousands of homeowners rely on our trusted advice to simplify their spaces—now it’s your turn.
 Head of Content & Lifestyle Strategist
Ask Williamen Glaseroller how they got into home solutions and fixes and you'll probably get a longer answer than you expected. The short version: Williamen started doing it, got genuinely hooked, and at some point realized they had accumulated enough hard-won knowledge that it would be a waste not to share it. So they started writing.
What makes Williamen worth reading is that they skips the obvious stuff. Nobody needs another surface-level take on Home Solutions and Fixes, Smart Living Hacks, Lifestyle Organization Strategies. What readers actually want is the nuance — the part that only becomes clear after you've made a few mistakes and figured out why. That's the territory Williamen operates in. The writing is direct, occasionally blunt, and always built around what's actually true rather than what sounds good in an article. They has little patience for filler, which means they's pieces tend to be denser with real information than the average post on the same subject.
Williamen doesn't write to impress anyone. They writes because they has things to say that they genuinely thinks people should hear. That motivation — basic as it sounds — produces something noticeably different from content written for clicks or word count. Readers pick up on it. The comments on Williamen's work tend to reflect that.
Head of Content & Lifestyle Strategist
Ask Williamen Glaseroller how they got into home solutions and fixes and you'll probably get a longer answer than you expected. The short version: Williamen started doing it, got genuinely hooked, and at some point realized they had accumulated enough hard-won knowledge that it would be a waste not to share it. So they started writing.
What makes Williamen worth reading is that they skips the obvious stuff. Nobody needs another surface-level take on Home Solutions and Fixes, Smart Living Hacks, Lifestyle Organization Strategies. What readers actually want is the nuance — the part that only becomes clear after you've made a few mistakes and figured out why. That's the territory Williamen operates in. The writing is direct, occasionally blunt, and always built around what's actually true rather than what sounds good in an article. They has little patience for filler, which means they's pieces tend to be denser with real information than the average post on the same subject.
Williamen doesn't write to impress anyone. They writes because they has things to say that they genuinely thinks people should hear. That motivation — basic as it sounds — produces something noticeably different from content written for clicks or word count. Readers pick up on it. The comments on Williamen's work tend to reflect that.