If you’ve been searching for a practical, stylish way to transform a plain room, learning how to build wood accent wall features is one of the most impactful upgrades you can make. Homeowners often want that warm, custom look—but feel unsure about materials, layout planning, cost, or whether it’s truly DIY-friendly. This guide is designed to answer those questions clearly and confidently.
We break down the process step by step, from choosing the right wood and measuring your space to installation techniques and finishing touches that make the design stand out. Along the way, we reference proven renovation best practices and smart planning strategies used by experienced DIYers and home improvement professionals.
By the end of this article, you’ll understand exactly what tools you need, how to avoid common mistakes, and how to create a wood accent wall that looks professionally installed—without unnecessary stress or overspending.
Does your living room feel flat and forgettable? A blank box with furniture? One of the simplest ways to change that is to build wood accent wall that instantly adds warmth, texture, and depth. It becomes the room’s focal point (yes, even more than the TV). You don’t need a contractor—just a weekend and a plan. I recommend:
- Choosing pre-cut panels for clean lines.
- Measuring twice to avoid costly mistakes.
- Staining samples first to test lighting.
Follow a step-by-step guide, take time, and you’ll have a statement wall by Sunday night. It’s easier than you think. Pro tip: start simple.
Designing Your Wall: Choosing the Right Wood and Pattern
When planning a feature wall, the wood you choose shapes the entire outcome—cost, effort, and final vibe.
Popular wood options:
- Reclaimed barn wood: Full of texture and history. It’s eco-friendly and character-rich, but often pricier and sometimes uneven (which can make installation trickier).
- New pine: Budget-friendly, lightweight, and easy to cut. It accepts stain well, though it can dent more easily than hardwoods.
- Cedar: Naturally resistant to moisture and insects. Great for humid rooms, but costs more than pine.
- Peel-and-stick planks: Ideal for renters. Minimal tools required, though long-term durability may vary.
If you want to build wood accent wall panels in a weekend, pine or peel-and-stick options are the most beginner-friendly.
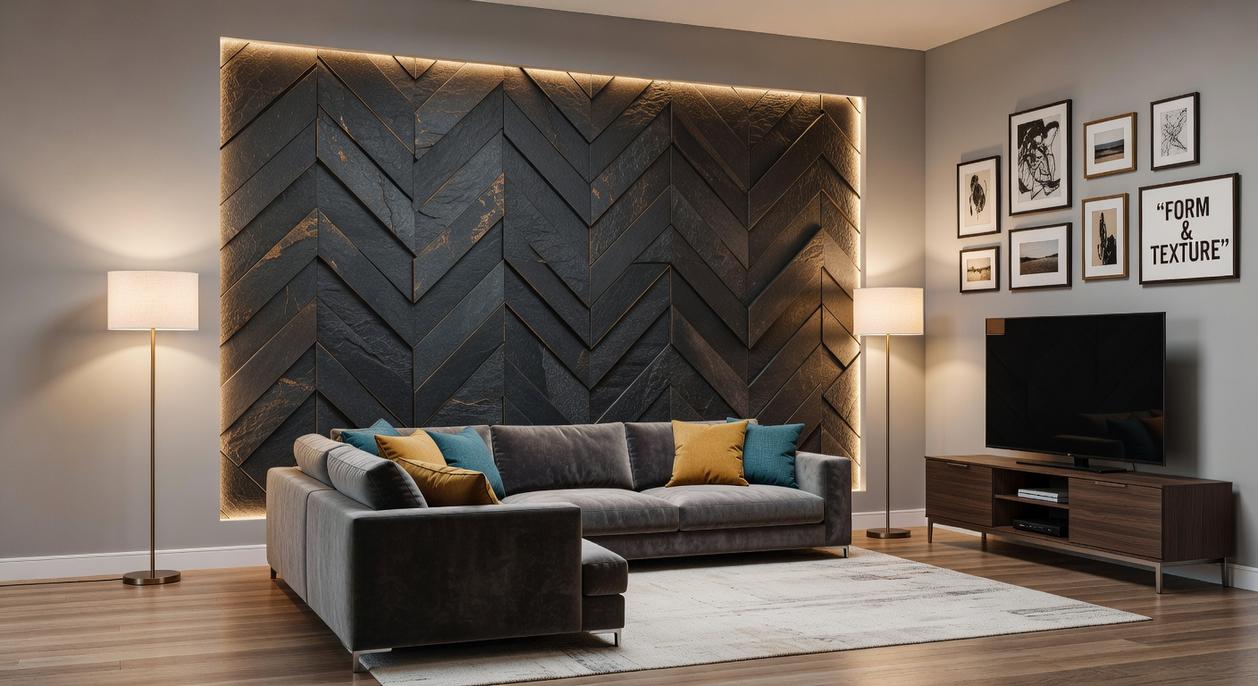
Choosing a Pattern
- Horizontal slats create a wider visual effect (great for narrow rooms).
- Vertical slats draw the eye upward, making ceilings feel taller.
- Herringbone or geometric layouts deliver a bold, modern statement—think HGTV-worthy drama.
Measure Like a Pro
- Measure wall width × height.
- Multiply for total square footage.
- Add 10–15% extra for cuts and mistakes.
Example: A 10 ft × 8 ft wall = 80 sq ft. Order about 92 sq ft to stay safe.
Your DIY Toolkit: Gathering Essential Supplies
The right tools don’t just make the job easier—they make it look professional. When you’re ready to build wood accent wall projects, having a clear checklist saves time, money, and mid-project frustration (because no one likes a last-minute hardware store run).
1. Essential Tools
- Miter saw (or miter box for budget-friendly precision)
- Level
- Stud finder
- Measuring tape
- Nail gun (or hammer and finishing nails)
- Pencil
2. Necessary Materials
- Wood planks
- Construction adhesive
- Sandpaper (medium and fine grit)
- Optional wood stain/sealer
What’s in it for you? Cleaner cuts, straighter lines, and a polished finish that boosts home value and pride.
Pro tip: Rent a miter saw if this is a one-time project—Home Depot reports tool rentals can cut costs by up to 50% versus buying (Home Depot Rental Center).
Another money-saver: Check local lumber yards or Facebook Marketplace for discounted wood bundles (hidden gems are everywhere).
Prepping Your Canvas: How to Prepare the Wall Surface
If you want a professional finish, preparation isn’t optional—it’s everything. Think of it like priming a canvas before painting. Skip it, and flaws will show (yes, even the tiny ones).
First, clear the space completely. Remove furniture, outlet covers, nails, and decor so nothing gets in your way. Then clean the wall thoroughly. Dust, grease, and residue can prevent adhesive or nails from gripping properly.
Next, repair imperfections. Use spackle (a paste used to fill small holes and cracks) to patch dents. Sand the area smooth once dry so your surface is even.
Before you build wood accent wall panels, locate studs. A stud finder is a handheld tool that detects framing behind drywall. Mark each stud lightly in pencil—this ensures your planks anchor securely.
- Clear and clean the wall
- Patch holes and sand smooth
- Find and mark studs
- Paint the wall black or dark brown to hide gaps
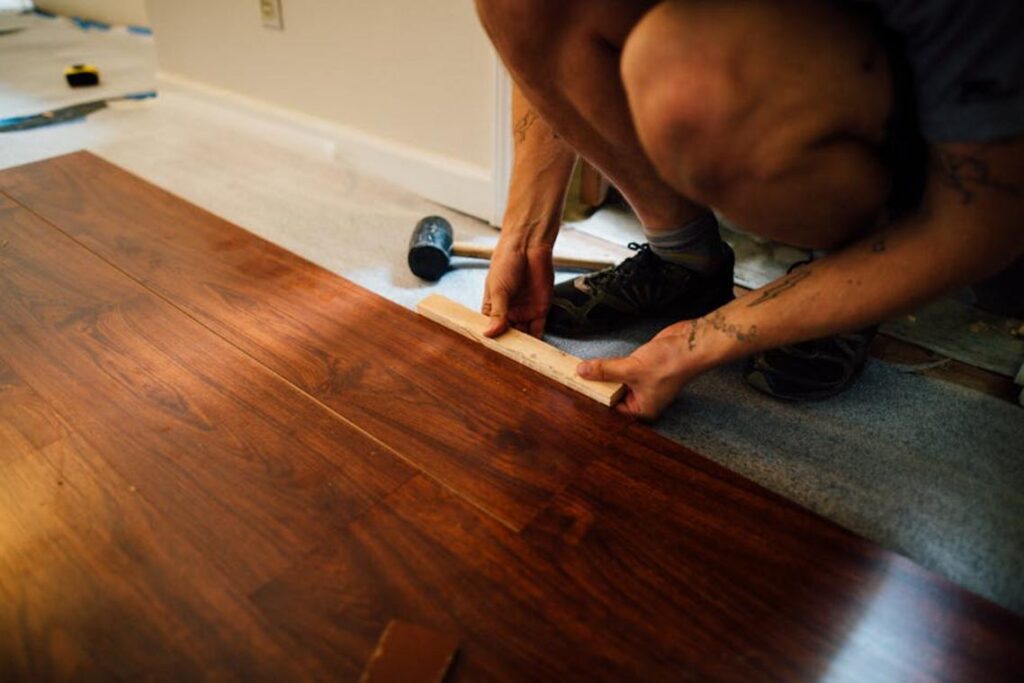
For more prep confidence, check this beginners guide to installing laminate flooring yourself.
The Build: A Step-by-Step Installation Guide
Building an accent wall isn’t complicated—but precision matters. In fact, according to the Forest Products Laboratory (U.S. Department of Agriculture), improper moisture control is one of the leading causes of wood warping and structural failure. So let’s do this right.
1. Acclimate Your Wood
First, let your planks sit in the room for 48–72 hours before installation. This process, called acclimation (allowing materials to adjust to a room’s temperature and humidity), prevents expansion or contraction after installation. Wood naturally absorbs moisture from the air; skipping this step can lead to gaps or buckling later. Stack the boards flat with spacers between them for airflow. It’s a patience game—but far less frustrating than a warped wall.
2. Make Your First Cuts
Next, measure the wall width carefully. Then measure again. (Yes, really.) The old carpenter’s rule—measure twice, cut once—exists because material waste adds up quickly. Mark your first-row planks and use a level surface when cutting to ensure clean, straight edges.
3. Install the First Row
Now, position the first row along the base of the wall. Use a level to confirm it’s perfectly straight. Even a 1/8-inch deviation can multiply across rows, creating visible slants. Since this row guides the entire layout, take your time here.
4. Attach the Planks
After that, use the “glue and nail” method. Apply construction adhesive in a zigzag pattern on the back, then nail into marked studs. This dual-bond approach increases holding strength—stud anchoring alone can loosen over time.
5. Stagger Seams and Cut Around Outlets
Finally, stagger seams for a natural look (think rustic cabin, not checkerboard). Randomize board lengths and measure outlet openings carefully before cutting. Always turn off power when working around electrical boxes. Follow these steps, and you’ll confidently build wood accent wall panels that look professional and last.
Stepping back to admire your finished wall is a special kind of satisfaction—the moment your effort turns into a transformed room. After you build wood accent wall, consider how you want it to age. For a subtle sheen and added durability, apply a clear, water-based polyurethane; alternatively, leave the wood natural for a softer, organic look. To keep it beautiful, dust weekly with a microfiber cloth and wipe spills promptly with a damp rag. Over time, check for loose boards or nail pops. Now, take that confidence and start planning your next upgrade. You have the skills to do it.
Ready to Transform Your Space with Confidence?
You came here to learn exactly how to build wood accent wall features that elevate your space without unnecessary stress or costly mistakes — and now you have the clear steps, tools, and confidence to make it happen.
A blank, boring wall can make an entire room feel unfinished. But with the right plan, measurements, and materials, you can turn that empty space into a statement piece that adds warmth, texture, and personality to your home.
Now it’s time to take action. Pick your wall, gather your tools, and start measuring today. Don’t let hesitation keep your space stuck in the same outdated look.
If you want more practical home solutions, smart DIY strategies, and easy-to-follow renovation tips that actually work, explore our step-by-step guides and start your next project with clarity. Thousands of readers trust our proven home hacks to simplify upgrades — and your transformation could be next.
 Head of Content & Lifestyle Strategist
Ask Williamen Glaseroller how they got into home solutions and fixes and you'll probably get a longer answer than you expected. The short version: Williamen started doing it, got genuinely hooked, and at some point realized they had accumulated enough hard-won knowledge that it would be a waste not to share it. So they started writing.
What makes Williamen worth reading is that they skips the obvious stuff. Nobody needs another surface-level take on Home Solutions and Fixes, Smart Living Hacks, Lifestyle Organization Strategies. What readers actually want is the nuance — the part that only becomes clear after you've made a few mistakes and figured out why. That's the territory Williamen operates in. The writing is direct, occasionally blunt, and always built around what's actually true rather than what sounds good in an article. They has little patience for filler, which means they's pieces tend to be denser with real information than the average post on the same subject.
Williamen doesn't write to impress anyone. They writes because they has things to say that they genuinely thinks people should hear. That motivation — basic as it sounds — produces something noticeably different from content written for clicks or word count. Readers pick up on it. The comments on Williamen's work tend to reflect that.
Head of Content & Lifestyle Strategist
Ask Williamen Glaseroller how they got into home solutions and fixes and you'll probably get a longer answer than you expected. The short version: Williamen started doing it, got genuinely hooked, and at some point realized they had accumulated enough hard-won knowledge that it would be a waste not to share it. So they started writing.
What makes Williamen worth reading is that they skips the obvious stuff. Nobody needs another surface-level take on Home Solutions and Fixes, Smart Living Hacks, Lifestyle Organization Strategies. What readers actually want is the nuance — the part that only becomes clear after you've made a few mistakes and figured out why. That's the territory Williamen operates in. The writing is direct, occasionally blunt, and always built around what's actually true rather than what sounds good in an article. They has little patience for filler, which means they's pieces tend to be denser with real information than the average post on the same subject.
Williamen doesn't write to impress anyone. They writes because they has things to say that they genuinely thinks people should hear. That motivation — basic as it sounds — produces something noticeably different from content written for clicks or word count. Readers pick up on it. The comments on Williamen's work tend to reflect that.