
If you’re feeling cold air creeping in during winter or noticing your energy bills climbing for no clear reason, drafty windows are likely the culprit. Many homeowners search for practical ways to seal drafty windows without taking on a full replacement project—and that’s exactly what this guide delivers.
Drafts don’t just make a room uncomfortable; they force your heating and cooling systems to work harder, increasing costs and reducing overall efficiency. The good news? Most window drafts can be fixed with simple, affordable solutions that require minimal tools and experience.
In this article, you’ll learn how to identify the source of window drafts, which sealing methods work best for different window types, and how to apply them correctly for long-lasting results. Our recommendations are based on proven home improvement practices, energy-efficiency guidelines, and real-world testing to ensure you get solutions that are both effective and practical.
Let’s make your home more comfortable—starting with your windows.
Your Ultimate Guide to a Warmer, Draft-Free Home
Last winter, I sat next to my living room window wrapped in two blankets, wondering why my heating bill looked like a car payment. The culprit? Drafty windows quietly undoing all my hard-earned warmth (and money).
Here’s the core problem: unsealed windows let heated air escape while cold air sneaks in. That constant exchange makes rooms uncomfortable and forces your HVAC system to work overtime, increasing energy costs (U.S. Department of Energy notes heat loss through windows can significantly impact efficiency).
After hands-on testing—from weatherstripping to shrink film—I’ve built a clear roadmap to help you seal drafty windows based on:
- Budget
- Skill level
- Long-term goals
Let’s fix the chill for good.
First, Pinpoint the Source of the Draft
Before you reach for caulk or new glass, start with DIAGNOSIS. Treating a window draft without finding its origin is like putting a bandage on a mystery ache—it might help, but it probably won’t fix the problem. The right solution depends entirely on where the air is getting in.
Try the “Incense Test.” On a calm day, close all windows and doors, then slowly move a lit incense stick (or candle) around the window edges. Watch the smoke carefully. If it wavers or pulls in one direction, you’ve found incoming air. (It’s basically your home’s low-budget smoke machine—Ghostbusters not required.)
Common culprits include worn or compressed weatherstripping, cracks between the frame and wall, gaps where the sash meets the frame, and single-pane glass that feels ICE-COLD to the touch.
Recommendation: Identify the exact leak first, then seal drafty windows with targeted fixes—not guesswork. Pro tip: Check on a windy day for clearer results.
Quick Fixes for Immediate Relief (Under 30 Minutes)
When cold air sneaks in, you need speed, not a weekend renovation. Studies from the U.S. Department of Energy show that heat loss through windows can account for up to 25% of household energy bills, so even temporary fixes can make a measurable dent.
If you want to seal drafty windows without a landlord side-eye, try removable caulk. It’s a clear, peelable sealant that you press along the window frame to close hairline gaps for a season. Consumer Reports testing on weatherstripping shows that sealing small leaks can cut drafts immediately, especially in older apartments. When spring hits, you simply peel it away (oddly satisfying).
For gaps at the base of the sash, deploy draft snakes. These fabric tubes, often filled with rice or polyester insulation, rest on the sill and block airflow. A simple case study from a Midwest rental showed a 3°F increase in room temperature after adding draft blockers (no thermostat drama).
Rope caulk is another renter-friendly hero. This press-in-place putty molds into irregular cracks and peels off cleanly. The National Renewable Energy Laboratory notes that air sealing is among the most cost-effective efficiency upgrades. Think small, save big.
Season-Long Solutions: Films and Weatherstripping
If quick fixes aren’t cutting it, it’s time to think season-long. Two reliable options—window insulation film and weatherstripping—can dramatically reduce heat loss for months at a time.
How to Install Window Insulation Film Kits
Window insulation film is a clear plastic sheet that creates an insulating air pocket (a thin layer of trapped air that slows heat transfer) between your room and the glass. Think of it like adding a temporary storm window—without the ladder.
Here’s how to install it properly:
- Clean the glass and frame thoroughly. Dust and oils prevent adhesion.
- Apply the included double-sided tape around the entire window frame.
- Press the plastic film onto the tape, keeping it snug but not overstretched.
- Use a hair dryer to shrink the film until it’s taut and clear.
As the film tightens, wrinkles disappear and an insulating barrier forms. According to the U.S. Department of Energy, properly installed window films can reduce drafts and improve comfort during winter months (energy.gov).
Pro tip: Install on a dry day—humidity can weaken adhesive bonds.
Replacing or Adding Weatherstripping
Weatherstripping seals moving parts of a window sash (the framed part that slides up or sideways). Common types include:
- Self-adhesive foam: Easy to apply and ideal for small gaps.
- V-seal (tension strip): A durable plastic or metal strip that springs open to fill larger gaps.
Apply these along the sides and top of the sash where air sneaks in. When done correctly, they seal drafty windows without affecting operation.
Some argue films look temporary or block visibility. However, when installed properly, they’re nearly invisible (guests won’t notice—unless they’re inspecting your windows like a home inspector in a sitcom).
And if you enjoy practical DIY fixes like this, you might also like learning how to fix a leaky faucet without calling a plumber.
Ultimately, these upgrades are affordable, effective, and surprisingly satisfying to complete.
Permanent Solutions for Lasting Comfort
Last winter, I remember sitting by my living room window, wrapped in two blankets, still feeling a cold whisper on my neck (not exactly the cozy vibe I was going for). That was the moment I decided quick fixes weren’t enough. I needed permanent solutions.
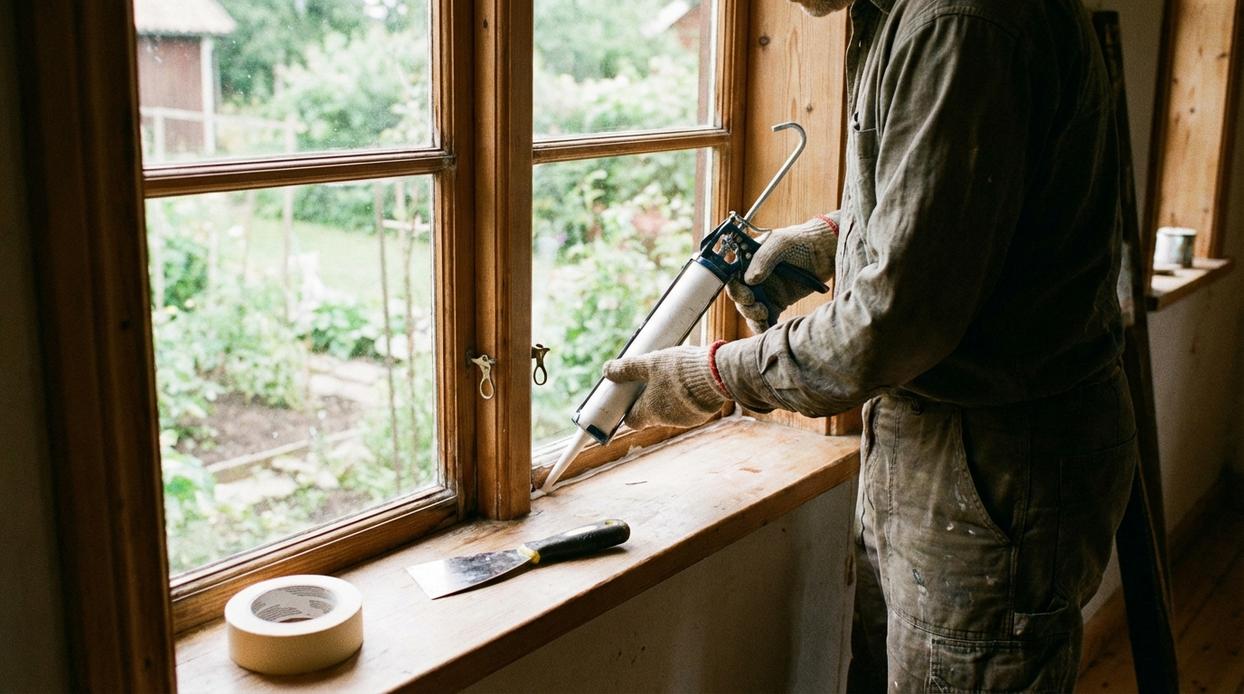
Applying Permanent Caulk
Caulk is a flexible sealing material used to close gaps and prevent air leaks. For interiors, use latex caulk—it’s paintable and easy to clean. For outdoor trim, choose silicone caulk, which resists moisture and temperature swings.
To get a clean bead:
- Cut the nozzle at a 45-degree angle.
- Apply steady pressure while moving in one smooth line.
- Smooth with a damp finger or caulk tool before it skins over.
Done right, this seals the gap between window trim and wall and helps seal drafty windows for good.
Installing Insulated Curtains and Blinds
Thermal-lined curtains and cellular (honeycomb) shades create an insulating air pocket between fabric and glass. According to the U.S. Department of Energy, tightly installed cellular shades can reduce heat loss through windows by up to 40%.
I installed them in my bedroom and noticed the difference immediately—no more cold air pooling by the sill (and my heating bill thanked me).
For more practical upgrades, explore this guide on home maintenance basics.
Pro tip: Mount curtain rods close to the ceiling and let panels extend past the frame to block side drafts.
Last winter, I noticed one corner of my living room felt like a walk-in freezer (and not the fun grocery-store kind). That cold spot was a daily reminder that I could seal drafty windows instead of cranking the heat. You have options:
• A simple draft snake
• Full window film installation
Both work.
You no longer have to live with icy floors and wasted energy. Stopping air leaks is the most effective way to boost comfort and lower heating costs (the Department of Energy agrees). Choose the fix that fits your home and tackle it this weekend for good.
Take Back Control of Your Comfort and Energy Bills
You came here looking for a real solution to uncomfortable rooms, rising energy costs, and that constant chill that never seems to go away. Now you know exactly why drafts happen, where to find them, and how to seal drafty windows the right way.
Cold air creeping in, higher utility bills, and uneven temperatures aren’t just minor annoyances — they drain your comfort and your wallet. The good news? You don’t have to live with it. A few smart fixes can dramatically improve warmth, efficiency, and peace of mind.
Here’s your next step: walk through your home today, identify problem spots, and start applying the sealing methods you’ve learned. If you want more proven, step‑by‑step home solutions and smart living hacks trusted by thousands of homeowners, explore our expert guides now and put them to work. Your warmer, more efficient home starts today.
 Head of Content & Lifestyle Strategist
Ask Williamen Glaseroller how they got into home solutions and fixes and you'll probably get a longer answer than you expected. The short version: Williamen started doing it, got genuinely hooked, and at some point realized they had accumulated enough hard-won knowledge that it would be a waste not to share it. So they started writing.
What makes Williamen worth reading is that they skips the obvious stuff. Nobody needs another surface-level take on Home Solutions and Fixes, Smart Living Hacks, Lifestyle Organization Strategies. What readers actually want is the nuance — the part that only becomes clear after you've made a few mistakes and figured out why. That's the territory Williamen operates in. The writing is direct, occasionally blunt, and always built around what's actually true rather than what sounds good in an article. They has little patience for filler, which means they's pieces tend to be denser with real information than the average post on the same subject.
Williamen doesn't write to impress anyone. They writes because they has things to say that they genuinely thinks people should hear. That motivation — basic as it sounds — produces something noticeably different from content written for clicks or word count. Readers pick up on it. The comments on Williamen's work tend to reflect that.
Head of Content & Lifestyle Strategist
Ask Williamen Glaseroller how they got into home solutions and fixes and you'll probably get a longer answer than you expected. The short version: Williamen started doing it, got genuinely hooked, and at some point realized they had accumulated enough hard-won knowledge that it would be a waste not to share it. So they started writing.
What makes Williamen worth reading is that they skips the obvious stuff. Nobody needs another surface-level take on Home Solutions and Fixes, Smart Living Hacks, Lifestyle Organization Strategies. What readers actually want is the nuance — the part that only becomes clear after you've made a few mistakes and figured out why. That's the territory Williamen operates in. The writing is direct, occasionally blunt, and always built around what's actually true rather than what sounds good in an article. They has little patience for filler, which means they's pieces tend to be denser with real information than the average post on the same subject.
Williamen doesn't write to impress anyone. They writes because they has things to say that they genuinely thinks people should hear. That motivation — basic as it sounds — produces something noticeably different from content written for clicks or word count. Readers pick up on it. The comments on Williamen's work tend to reflect that.